
Synth Secrets is a series of programming tutorials in which we show how to make a range of classic and new synth sounds using plugins such as Massive, Sylenth and Diva.
In this instalment of Synth Secrets we’ll be using 808-style sounds created with Xfer’s Serum plugin and Fabfilter’s Saturn distortion to create this crunchy tech-house rhythm:
Step 1
The 808 bass is a sound that has resonated throughout techno, house, hip-hop and electro for quite some time now. Due to its chest rumbling sensation it tends to be used in all kinds of club music to give the listener a full-body bass experience. The kick in the original Roland TR-808 drum machine uses a sine wave to produce the sound, which is why it has a distinct pitch or tuning when played, especially when a long release time is used. We’re going to show how to make this sound using Xfer Serum, and then process it using some saturation plugins to ensure it’s audible even through the smallest of speakers.
In Serum, start with the init patch and change the first oscillator to Analog > Analog_BD_Sin. You will recognise the sound immediately.

Step 2
Make sure that Detune, Blend and Rand are all turned completely anticlockwise to ensure that the sound is not affected by these parameters later on.

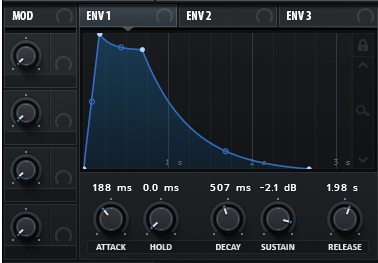
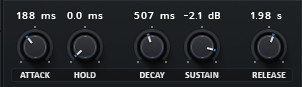
Change your attack, decay, sustain, and release settings as set below. The slower attack will ensure that there are no clicks even though we do find that added punch quite useful sometimes. The release is dependant on your taste. We have a slightly longer one here to give a smooth tail to the sound.
Step 3
Next link ENV 2 to the Semitone section of OSC A. This is going to enable us to control the pitch using the envelope from ENV 2.
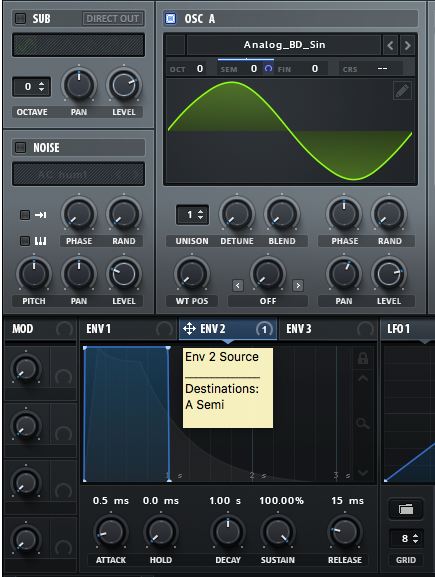
Change the ENV 2 settings to the values below. Notice how the sound slides downwards now to its original note. Really starting to feel the club vibe here!
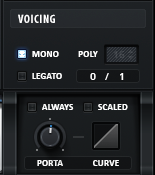
To ensure that the notes don’t overlap because of their long tail, we need to change the voicing to mono. We’re also going to add portamento and get that sliding effect between notes. About 300ms seems to do the trick.
Step 4
The filter section in Serum is well known for adding that all-round beef to the sound. Taking out some of the high frequencies will focus it more towards the rumble and we’re able to make our sound thicker using the FAT and DRIVE dials. Tune these in to taste until you’re reaching the desired beefiness.

In order to bring a little more focus to the high frequencies now, we are going to use the distortion unit within Serum. Our favourite is Tube. Use the HP (high-pass) filter to bypass the distortion on the lower frequencies, which may result in losing sub. We’ve turned down the Q setting to avoid any resonance. A light dose of distortion controlled by the DRIVE and MIX dials should start to give some nice harmonics

Step 5
In order to bring out the harmonics further, we are going to come back to oscillator A and its WT POS control, which stands for wavetable position. In case you didn’t already know, Serum is a wavetable synth which allows it to use complex waveforms to produce sound, resulting in some unique tones.
We’ve adjusted the WT POS to about 209, which is making the sound pop out of the speakers even more.

Step 6
Let’s now focus on processing the sound using some third-party plugins in order to get it to a commercial standard. Similarly to what we did in Serum, we are going to use Fabfilter Saturn to add some multi-band saturation. We’ve split the different saturation points at 123 Hz. Both sides have the Warm Tape setting, but the lower end has far less drive to avoid losing any fat sub frequencies.


Some fairly extreme settings from the UAD Neve 31102 EQ have been added to bring out the high frequencies even further.
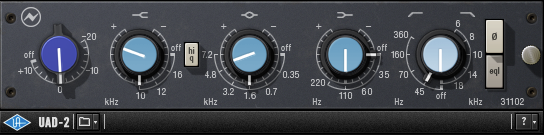
This final EQ should give the sound the polish it needs to push through smaller speakers without taking over the whole track. Remember that this type of sound is going to take up a lot of space in the mix and needs to be mixed cleverly so that it maintains a good relationship with the kick. Try adding a subtle amount of sidechain compression if you find it takes over the low end of your track.